Customer Projects

Cigar Box Guitar Hinge CBG Tailpiece - Choose 3 or 4-String
I built this kit but changed a few things. I didn’t use the tuners that came with the kit. Instead I installed some spare tuners of different colors to give it a more interesting look.

Marion, IN, USA
Instrument Build

Cigar Box Guitar Hinge CBG Tailpiece - Choose 3 or 4-String
I built this kit but changed a few things. I didn’t use the tuners that came with the kit. Instead I installed some spare tuners of different colors to give it a more interesting look.

Marion, IN, USA
Instrument Build

Cigar Box Guitar Hinge CBG Tailpiece - Choose 3 or 4-String
I built this kit but changed a few things. I didn’t use the tuners that came with the kit. Instead I installed some spare tuners of different colors to give it a more interesting look.

Marion, IN, USA
Instrument Build

The Hobo Fiddle DIY Kit by "Boxcar" Ben Gitty
Lots of fun to build. Very good instructions. I used a light stain where the lettering and on the fret board. Darker stain every where else. I love the look of it.

Carrot River, SK, Canada
Instrument Build

The Hobo Fiddle DIY Kit by "Boxcar" Ben Gitty
This was a fun little project. I decided to use a router to do my headstock and lid recesses. Slipped a little and had to use a little wood filler to fill in some holes in the headstock and part of the tailpiece. Then I made the mistake of only eyeballing the measurements for my sound holes. That left one of my holes right smack under the leg of my bridge. So, a little more wood filler, some more accurate measurements, and I had new holes that weren’t covered up. I used an espresso stain on the neck, back, and sides. I used an Ipswich pine stain for the front. I put a little espresso on the wood filler on the front of the box. The espresso made the wood filler in the headstock and tailpiece look like knots in the wood, which I really like. I think it makes the train look like it’s throwing puffs of smoke on the front of the box. So, I was actually able to hide my mistakes. Lol. I did have a bit of trouble mounting the string retainer at the top, by the headstock. I just couldn’t get a drill bit in to drill the pilot holes and then I didn’t have a skinny enough screwdriver to be able to get at the screws from a straight line. So, that part turned out kind of wonky, but it works. I think I probably should have put more of the neck out the bottom of the box because the fretboard doesn’t go all the way to the body. But, I don’t mind if. I love how it ultimately turned out. The action is perfect. It plays kind of quiet, but that’s good. I won’t scare my neighbors with my horrible playing. I’m a history buff and there’s something kind of fascinating about hobos. Perhaps someone built something like this to accompany their adventures, long ago on a train bound for the next stop.

Colorado Springs, CO, USA
Instrument Build
The Hobo Fiddle DIY Kit by "Boxcar" Ben Gitty
This is my first cigar box guitar and i loved building it. I will be trying my hand at making one of my own creations in the near future.

Sault Ste. Marie, ON, Canada
Instrument Build

The Hobo Fiddle DIY Kit by "Boxcar" Ben Gitty
Kit was perfect. My woodworking tools, not so much. Used a 1” chisel for the neck pocket after my router died.

Brookline, NH, USA
Instrument Build

The Hobo Fiddle DIY Kit by "Boxcar" Ben Gitty
Turns out all my saws suck!!! Amazing what you can do with a 1” chisel and sanding block. Plays great. On to the next project.

Brookline, NH, USA
Instrument Build

The Hobo Fiddle DIY Kit by "Boxcar" Ben Gitty
It was simple to build.

Hoyt, KS, USA
Other

4pc. Chrome Adjustable Indie Bass Guitar Bridges, "Snake Oil" Mini Humbucking Pickups - Choose Color & Pre-wired Options, The Hobo Fiddle DIY Kit by "Boxcar" Ben Gitty
I wanted a 3-string electric bass uke that I can travel with. The 17” scale of the hobo fiddle is half the 34” scale of a regular bass, so that got me thinking. I wanted the instrument to use regular bass strings without cutting, so I concocted this design with the strings wrapping around the body.

Sherbrooke, QC, Canada
Instrument Build

The Hobo Fiddle DIY Kit by "Boxcar" Ben Gitty
I had a little trouble with the cut outs because I’m not strong at using a coping saw, but was otherwise grateful for not needing to make all the parts. ?
Instrument Build

The Hobo Fiddle DIY Kit by "Boxcar" Ben Gitty
Now, all I have to do is learn how to play it.

Other

The Hobo Fiddle DIY Kit by "Boxcar" Ben Gitty
Now, all I have to do is learn how to play it.

Other

The Hobo Fiddle DIY Kit by "Boxcar" Ben Gitty
Finished my third C.B. Gitty kit Yesterday. Their Hobo Fiddle. Quick one day build. Colorized the logo with watercolor pencils, finished with walnut stain then a clear coat of satin nitrocellulose lacquer. Love it!

Lititz, PA
Instrument Build

The Hobo Fiddle DIY Kit by "Boxcar" Ben Gitty
Finished my third C.B. Gitty kit Yesterday. Their Hobo Fiddle. Quick one day build. Colorized the logo with watercolor pencils, finished with walnut stain then a clear coat of satin nitrocellulose lacquer. Love it!

Lititz, PA
Instrument Build

The Hobo Fiddle DIY Kit by "Boxcar" Ben Gitty
Used a different box and D'Addario EXP17 strings. Had to modify the longer box to fit the 17" fretboard. Used the the neck that came with the kit. Lower the bridge to get the action heigth I wanted. Sounds and plays great.

Oakman, AL, USA
Instrument Build

The Hobo Fiddle DIY Kit by "Boxcar" Ben Gitty, "Tin Pan Alley" 3-String Paint Can Resonator Guitar Kit, The Mountain Tenor Acoustic DIY Box Guitar Kit - Choose 3 or 4-string, "DeltaBucker" 4-string Rosewood Cigar Box Guitar Humbucker Pickup pre-wired with Jack - No Soldering!, 3-pack 20mm Piezos with Leads, Standard 1/4-inch Mono Guitar Jacks - Choose Finish & Pack Size
I have completed 3 C. B. Gitty kits to date. They are the Mountain Tenor, the Hobo Fiddle, and the Tin Pan Alley. As I set the 3 of them up for a family picture, I realized all 3 were acoustic kits that I converted to electric. I also added a headstock decoration on all 3. I really like all of them. They're completely different but each is great in their own way.

Dallas, TX, USA
Instrument Build

The Hobo Fiddle DIY Kit by "Boxcar" Ben Gitty
I liked the concept. With the fretted neck and 17” scale. Although the cherry and tobacco vignette ones looked great, I figured I’d try my hand at coloring it. Decided not to use Watco or Minwax oil stains ... because I wanted to use acrylics and a clear acrylic coat. So, I got black walnuts out of my neighbor’s yard. Then used the “water” from the husks to stain it. I thought walnut was brown! But it came out a yellowish color. As it dried, more brown showed up. It really brought out the grain on the poplar neck! Maybe next time I will see how the oak fretboard reacts to the walnut. I had photos of some famous 4-4-0 locomotives, but decided not to paint it bright. So I put a lot of water in my paints and used “washes” of color. The brownish color on either side of the circle was because of an early version Ben Gitty made with straight brown lines in those areas. So I mixed a brown wash, applied it, then when it was sort of dry, I rubbed it with more fresh walnut husks. I finally decided to quit messing with the locomotive .. and just sprayed on the clear matte finish. And there you have it.

Marion, IL, USA
Instrument Build
- SKU:
- SB-4915-Parent
- UPC:
- 847490016896
- Brand
- etrading
- Availability:
- 45" Masonic Ceremonial Sword Templar Knight Freemasonry Handle with Plaq
- Weight:
- 10.00 LBS
- Shipping:
- Calculated at Checkout
Customer Reviews
Product Description
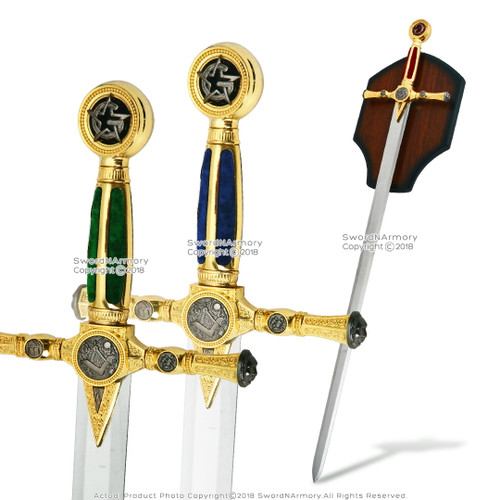
This is the Masonic Sword with all the ancient secrets and tradition that mark the society of its name. The Masons are one of the oldest known secret societies and have an intriguing history with ties to the Templar knights, presidents and kings. The sword was always used as an instrument of justice, truth, equality and firmness. Swords have been used at every great event and have become imbued with great symbolism. For this reason, Freemasons used swords in all their ceremonies.
The compass stands prominent against the cross guard of the sword, interwoven into a tapestry of the Masons symbols. The artwork and symbols found along the cross guard and pommel are in relief of silver and gold. At the ends of each cross guard is a moon and a sun. The handle of the sword is golden with Blue velvet and detailed fittings. The pommel of the sword is a G set against a blue background.
Item Specs:
- Overall Length: 45 "
- Blade Length: 36 "
- Blade Steel: Stainless Steel
- Blade: False-Edge
- Handle Material: Cast Metal
- Condition: Brand New in the box
0 Reviews
Shipping & Returns
To edit this page simply login to the control panel, click the Website Content tab and choose the View Web Pages option. Click Edit next to the Shipping & Returns page and you can change this text. A sample returns policy is shown below which you can edit as needed.
Returns Policy
You may return most new, unopened items within 30 days of delivery for a full refund. We'll also pay the return shipping costs if the return is a result of our error (you received an incorrect or defective item, etc.).
You should expect to receive your refund within four weeks of giving your package to the return shipper, however, in many cases you will receive a refund more quickly. This time period includes the transit time for us to receive your return from the shipper (5 to 10 business days), the time it takes us to process your return once we receive it (3 to 5 business days), and the time it takes your bank to process our refund request (5 to 10 business days).
If you need to return an item, simply login to your account, view the order using the "Complete Orders" link under the My Account menu and click the Return Item(s) button. We'll notify you via e-mail of your refund once we've received and processed the returned item.
Shipping
We can ship to virtually any address in the world. Note that there are restrictions on some products, and some products cannot be shipped to international destinations.
When you place an order, we will estimate shipping and delivery dates for you based on the availability of your items and the shipping options you choose. Depending on the shipping provider you choose, shipping date estimates may appear on the shipping quotes page.
Please also note that the shipping rates for many items we sell are weight-based. The weight of any such item can be found on its detail page. To reflect the policies of the shipping companies we use, all weights will be rounded up to the next full pound.
Customer Reviews
Related Products
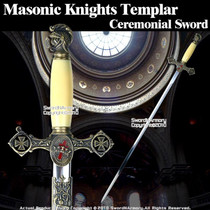
Masonic Knight's Templar Ceremonial Sword Antiqued
This is the Masonic Knight's Templar Ceremonial Sword White Handle Antiqued. The blade of the sword is 440 stainless steel with slightly sharpened edges and a very sharp point. A ridge runs down the...
Munetoshi
39" Fraternal Masonic Sword Templar Knight Freemasonry 2
This is the Masonic Sword with all the ancient secretes and tradition that mark the society of its name. The Masons are one of the oldest known secret societies and have an intriguing history with...
Munetoshi
39" Fraternal Masonic Sword Templar Knight Freemasonry 1
This is the Masonic Sword with all the ancient secretes and tradition that mark the society of its name. The Masons are one of the oldest known secret societies and have an intriguing history with...
15â?Masonic Ceremonial Dagger Templar Knight Freemasonry Scabbard Gold Relief
You don’t have to belong to the Masons to own this Masonic Dagger with all the ancient secrets and tradition that mark the society of its name. The Masons are one of the oldest known secret societies...